AUTOMATIC TRANSMISSION SHIFTER CABLE ADJUSTMENT
- Shift transmission into Park.
- Raise vehicle.
- Release cable adjuster clamp to unlock cable (Fig. 47).
- Unsnap cable from cable bracket (Fig. 47).
- Move transmission shift lever all the way rearward into Park detent. Lever is on manual valve shaft at left side of case.
- Verify positive engagement of park lock by attempting to rotate propeller shaft. Shaft will not rotate when park lock is engaged.
- Snap cable into cable bracket.
- Lock shaft cable by pressing cable adjuster clamp down until it snaps into place.
- Check engine starting. Engine should start only in Park and Neutral.
- Lower automobile.

AUTOMATIC SHIFTER'S PARK LOCK CABLE ADJUSTMENT
- Shift transmission into Park.
- Turn ignition switch to Lock position.
- Remove shift lever bezel and console screws. Raise bezel and console for access to cable.
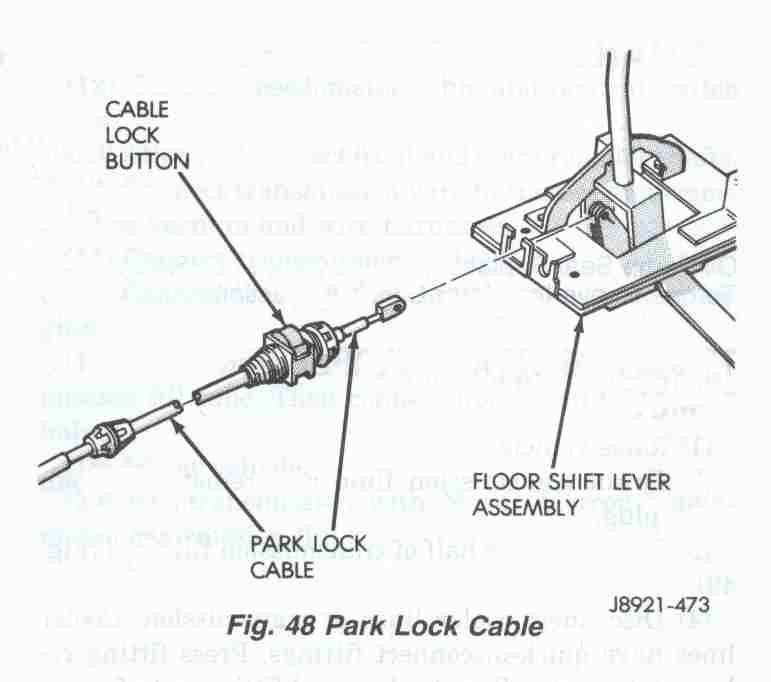
- Pull cable lock button up to release cable (Fig. 48).
- Pull cable forward. Then release cable and press cable lock button down until it snaps in place.
- Check adjustment as follows: Fig. 47 Shift Cable Adjustment :
- (a) Check movement of release shift handle button (floor shift) or release lever (column shift). You should not be able to press button inward or move column lever.
- (b) Turn ignition switch to On position.
- (c) Press floor shift lever release button or move column lever. Then shift into Neutral. If cable adjustment is correct, ignition switch can not be turned to Lock position. Perform same check with transmission in D range.
- Move shift lever back to Park and check ignition switch operation. You should be able to turn switch to Lock position and shift lever release button/lever should not move.
If you have pics of your own repairs or can suggest other methods - please contribute your ideas (and pictures) to this article!
|
Revised on:
January 29th, 2007 |