Towing generates a lot of extra heat and too much heat can kill your transmission! Now if you're one of the lucky ones who have a factory tow package on your XJ, then you most likely have a transmission cooler installed up front of your radiator and air conditioner condensor. However, if your XJ doesn't have a cooler and you are towing a boat, camper or trailers loaded with parts it's a good idea to install a transmission cooler to help dissipate some of that extra heat.

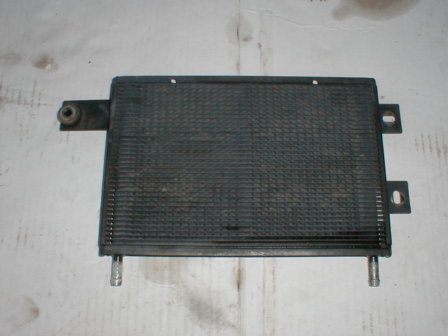
While you can stagger into your local auto parts store and buy a new one for $30 or more, I found SEVERAL excellent candidates at a local junkyard and ended up paying $20 for two coolers and a set of foglights! The transmission cooler I scored was from a VERY new Ford Exploder and was in PERFECT / 'like new' condition.


Faster than ya can peel Mary Anne Yabloniski's panties off on prom night, I had that puppy stripped off and was outta there (and just like prom night, don't leave anything in the back seat and clean your tools afterward )!

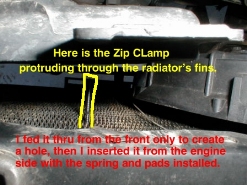
Don't forget to grab the clamps and hose if they're new and in PERFECT shape, otherwise make a pit stop at the local auto parts store for some Hi-Temp Transmission hose before ya get started. You'll also need a pack of the 'zip tie' clamps that Advance / AutoZone etc carries in their Radiator Supply area. They're used to hold electric fans & after market coolers onto radiators and are inserted thru the radiator fins. They're about $6 for a pack of 4.


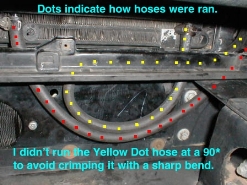
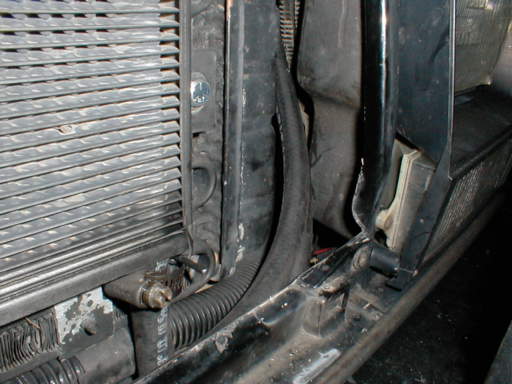
The pictures are pretty much self-explanatory but notes are embedded so ya can just hold your mouse over the picture for a brief explanation if needed.

NOTE! - BE CAREFUL! You don't want to punch a hole in your radiator or air conditioner condensor coils!

Our virgin sacrifice from a Ford Exploder Test fitting shows I can use 1 existing bolt and use condensor loop for lower bolt hole.
Center hole wasn't close enought to be adapted to fit grille upright brace.
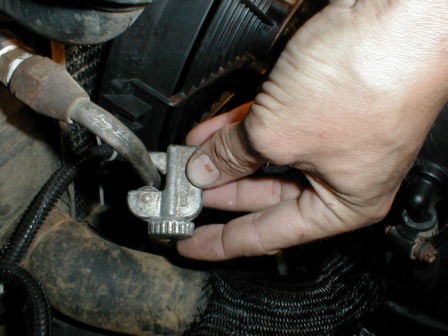
I was hoping to use the center support to attach the cooler too but that idea didn't quite work out as can be seen in the next two photos.

Reused upper existing bolt, purchased one bolt with some LARGE fender washers and a nylon locknut for lower bolt.
Hardware store bolt on bottom used with LARGE fender washers and nylon lock nut.
BE CAREFULL! DO NOT USE A BOLT THAT IS TOO LONG!

Not close enough to bolt to upright brace so I used a Zip Clamp for the center hold-down. Pressed Zip Clamp through from front to mark hole inside, removed, installed spring & pad then reinstalled FROM INSIDE toward front.
Zip Clamp retainer just slides onto shaft until it's good and snug, then clip off about an inch or so out. A small tubing cutter comes in handy. Just be absolutely sure of where ya wanna cut!

I didn't lose enough tranny fluid to worry about but ya might wanna use a rag just in case! Be sure NOT TO GET METAL CHIPS INTO LINE!
I didn't lose enough fluid to worry about but the rags come in handy just in case. Make sure ya don't get any debris in the line! Loosen the upper portion (at fingers) and allow it to pivot down.

Call me paranoid, but since I didn't flare the lines I used two clamps on each end!
Double clamp the hoses after installation!
Picture shows final location of upper line upon completion and is shown here out of sequence.

Running the lines will depend on what type cooler ya snagged and where the inlet & outlet are. Just route carefully to prevent trail damage AND/OR wearing thru by abrasion on body metal!
Picture shows area below radiator normally hidden by OEM bumper.

I ran the lines around the radiator and secured them to keep them in place.
Avoid moving parts and sharp edges when routing hoses!
Route carefully to prevent trail damage too!

Well mounted! (Just like Mary
Final mounting seen from front with grille removed and looking thru brush guard bars.

Everything is self explanatory but notes are embedded in the pictures... MicroSloth Exploder users can hold your mouse over the picture for a brief explanation of what was done or right click & read the alt tag. FireFox users will have to look at the photo properties.

All together, this mod cost less than $15 including 4 NEW clamps, about 6' of NEW high temperature transmission hose and a dang near new junkyard tranny cooler!

NOTE! This style tranny cooler does slow down some airflow thru your radiator and my engine runs about 5* warmer than before even on my 3-row radiator. Hmmmm. No problem for me yet but crawling in hot temperatures could be a problem.

So, what's the solution? Relocate the transmission cooler away from the radiator and add a motorcycle cooling fan taken from a Yamaha R6 to keep things cool!

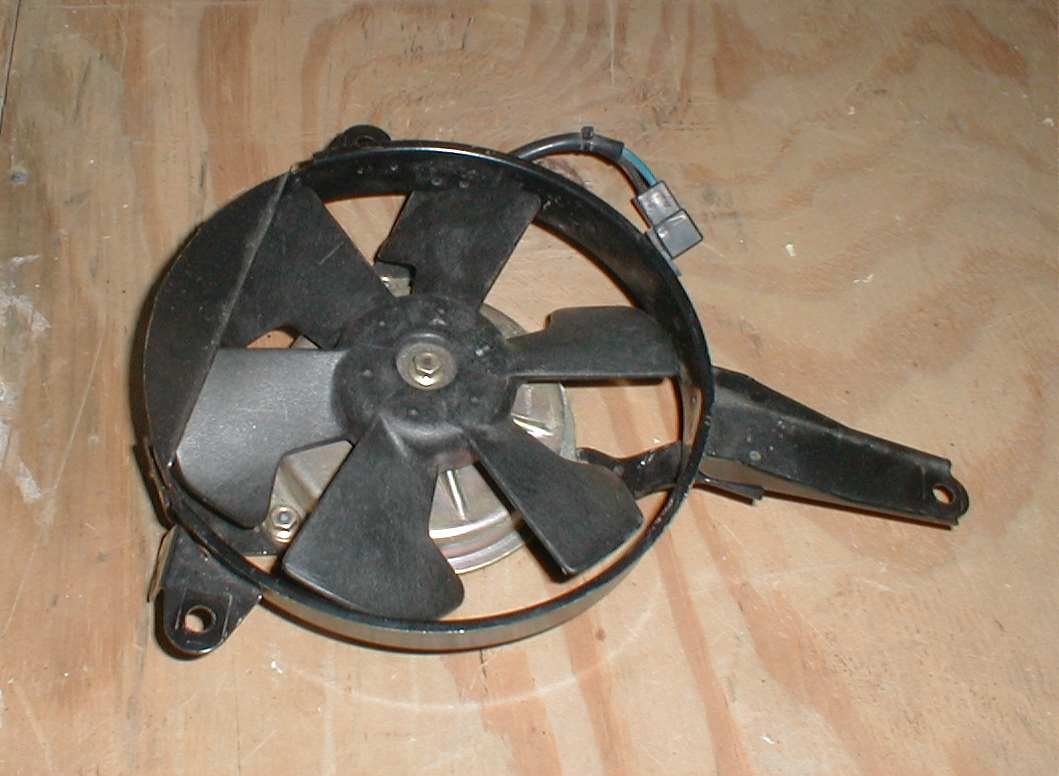
Here's a pic to give you a taste of what's to come... This is a used Yamaha R-6 fan I scored off of eBay for about $10. You can also get a 'new one' (like this one) and pay tons of cash. Me? I'll take cheap any time!

Used RG Yamaha engine cooling fan is perfect size for this tranny cooler! Look for a used one as the new ones are quite pricy...

( *** INSERT REMOTELY LOCATED TRANSMISSION COOLER ARTICLE LINK HERE*** )


If you have pics of your own repairs or can suggest other methods - please contribute your ideas (and pictures) to this article!

Revised on: April 25th, 2007


Tech Index.

Home Page.


Bookmark this website!


Translation_Icon


Translate this webpage to any language supported by Google Translate!


Search this website or the web for related information!

Google