Jeep Cherokee Charging System Upgrades
Did you ever buy something and pay a little extra 'cause ya want it to last and never worry about it again? Never seems to work out that way , does it? When I upgraded my Jeep Cherokee's charging system; one of the many changes I made was the addition of heavy duty Marine style battery terminals from NAPA auto parts along with an overhaul of the XJ's wimpy alternator & battery cables (refer to Craig's EXCELLENT website!)
I figured, 'Fix it right once and forget it!' Right?
Well... what I forgot was Murphy's Law and how manufacturers will cut every corner possible in order to shovel garbage out the door for us to buy. I did my overall charging system upgrade about 2 years prior to this repair when I found that my Cherokee was getting hard to start and acting like the battery was weak. This was so gradual that it was almost unnoticable. I also couldn't understand how a 180 amp alternator with #1 gage cables and a recent gell cell battery could have problems starting a 4.0L. A quick check showed voltages of 14.5v running and 13.v or so with the motor off. Hmmmm..... (Hint: A battery load test would have been good to run at this point. Any good auto-parts store can do this for you.)
The resulting investigation was a real head-scratcher but I just
couldn't see anything obvious. Voltages were good but the darn thing didn't
want to start. So what had happened? Something simple that the idiot
(Translation: Engineer.) who designed the clamp should have forseen, but
didn't.
The soft lead holding things together lost a contest between itself
and the steel bolt with heavy battery cables attached allowing the bolt to PULL
OUT of the clamp! This meant the battery was not getting full charge from the
alternator and the starter was not getting full power from the battery. Result?
The heavy gage cables finally tugged the cable bolt out of the battery terminal
and left me to do an emergency roadside jury rig repair when it wouldn't
start!
So if you have these marine terminals on your Jeep - What are
you gonna do?
Fix it before it breaks!
First things first: Check your clamp to see if it's made the
same way. Some clamps may be manufactured by someone with enough sense to do it
right, but if not... (and as odd as this sounds),
"If it ain't broke...
Go break it!"
Yup. If yours is made the same way with the bolt cast into
the lead then you need to first remove the battery clamp, put a couple of nuts
on the bolt to protect the threads and finagle that bolt out with a vice &
prybar or whatever other means of mayhem you choose to remove the bolt. Just
remember that the goal isn't to destroy the terminal but to take it apart
NEATLY and in good enough shape so you can be able to fix it the way the
factory should have done it.
On with the show:
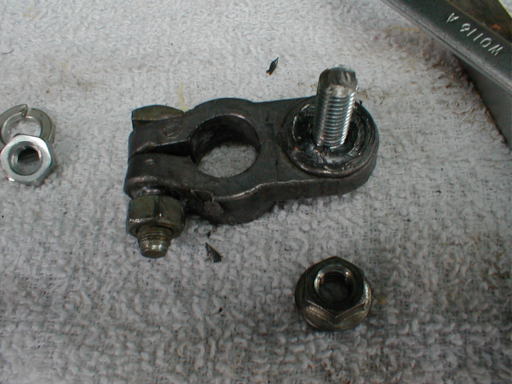
 Here is the $@#*&@(* bolt that pulled loose from the soft lead clamp because the crackhead who designed it was too damned stupid to run this bolt THROUGH the lead so that the nut would pull it INTO the terminal clamp rather than the other way around. (Heavy gage cables exert a lot of pressure on these terminals and contributed to this failure.) Also shown are a new bolt and nuts for the repair. |
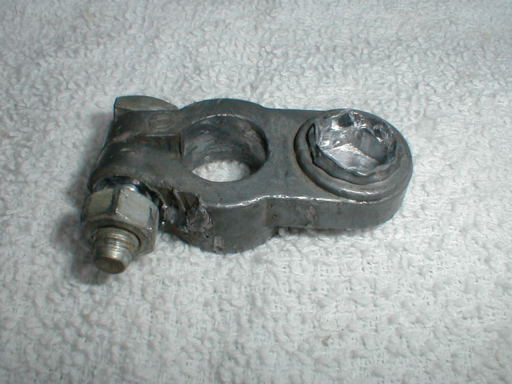 You can see where the bolt simply pulled out of the soft lead leaving only a memory... and no way for the battery to be properly charged or to start the vehicle. It slowly pulled out of the clamp over a period of time and acted like a weak battery (it was... but only due to poor charging). Showed good voltages when checked with a digital volt meter. |
 Repair begins by drilling a hole the SAME size as the bolt that came out of the clamp. This hole MUST be centered pretty close to perfect or it'll be a pain to do this! (Take the time to drill this on a drill press.) Don't trim off the flared out lead from where the old bolt pulled out as it will compress back around the new nut and help maintain a proper connection. |
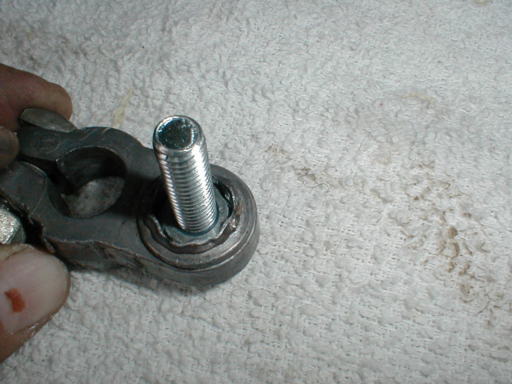 Insert a serrated washer onto the new bolt and then thread it up through the bottom of the soft lead clamp. There is no need to tap out the hole as the bolt will cut the lead quite easily. Before the bolt comes quite through into the bottom of the old bolt hole, insert a nut into the hole and finagle the bolt into it and thread it though and tighten it down so that it won't come loose. |
 Thread another nut with a flat washer onto the new bolt / nut assembly and snug it down to compress the soft lead back around the new nut and bolt. If needed, this is the time to cut down the bolt with a hacksaw if it's too long to clear the hood or whatever. While you're at it, knock off any burrs / sharp edges with a file. Removing the nut to make your cable connection will chase any remaining burrs from the threads.. |
Total cost for this repair/preventative
maintenance will be under $1.00 for two bolts 1/2" to 3/4" longer than the
original one, some nuts and a pair of serrated washers to go between the clamp
and the bolt head underneath. Reinstall it and fix the other side while you're at it! Now cuss cause you just lost all your radio presets and only your son knows how to program the dang radio... |
That's it! Cheap insurance for under a buck.
If you have pics of your own repairs or can suggest other methods - please contribute your ideas (and pictures) to this article!
|
|
|
Revised on:
October 10, 2006 |